

How's your weekend going? I hope it's fruitful and lovely! Here comes a cool react project which is the "task tracker". Let me steel the next 3 minutes of your perfectly managed time to make your weekend a little bit more interesting with this cool project.
As for the boiler plate, you need to install react JS in prior to work on this project. You can get the prerequisites fulfilled in my previous post. I'll provide the link at the end, don't worry about it.

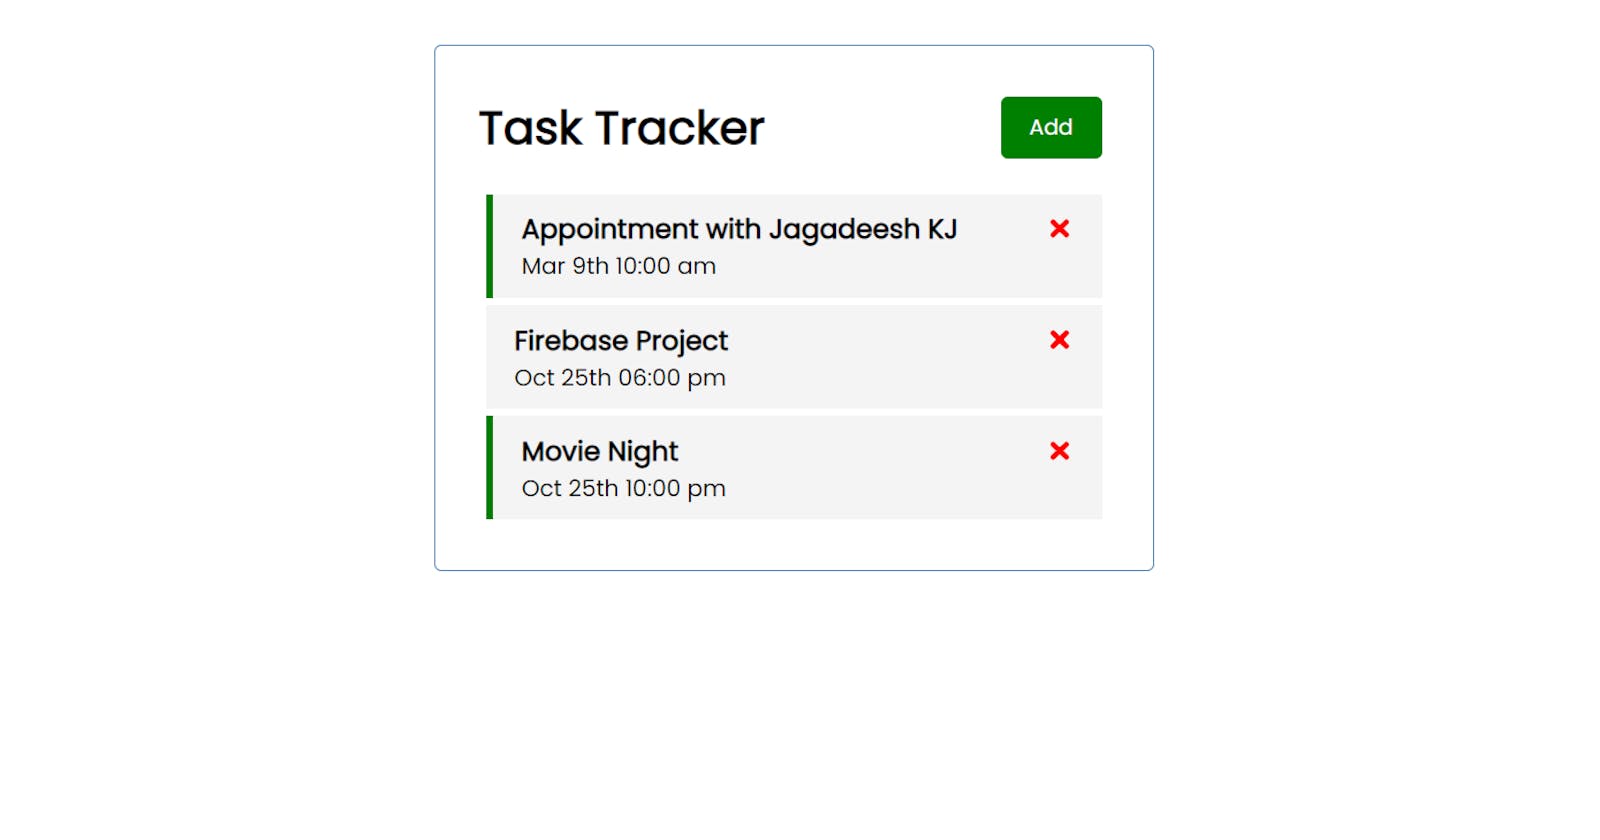
Thanks to Brad Traversy for making this possible. Here is a picture of showing that every highlighted one is a unique and reusable component in react.
Let's Start Building
The idea is to make a track of our tasks as you see the usecase in Notes or Tasks in your mobile devices. Yes, but this is gonna be a webapp. Here we add some tasks and make some tasks as reminders and then let the react manage them.
App.js
import { useState } from "react";
import AddTask from "./components/AddTask";
import Header from "./components/Header";
import Tasks from "./components/Tasks";


function App() {
  const [showAddTask, setShowAddTask] = useState(false);
  const [tasks, setTasks] = useState([
    {
        id: 1,
        text: 'Marvels Appointment',
        day: 'Oct 15th at 2:30pm',
        reminder: true,
    },
    {
        id: 2,
        text: 'Meeting at School',
        day: 'Nov 5th at 1:30pm',
        reminder: true,
    },
    {
        id: 3,
        text: 'Grocery Shopping',
        day: 'Nov 6th at 4:30pm',
        reminder: false,
    },
  ])

  const addTask = (task) => {
    const id = Math.floor(Math.random() * 10000) + 1
    const newTask = {id, ...task}
    setTasks([...tasks, newTask])
  }

  const deleteTask = (id) => {
    setTasks(tasks.filter((task) => task.id !== id))
  }

  const toggleReminder = (id) => {
    setTasks(
      tasks.map((task) =>
        task.id === id ? {...task, reminder: !task.reminder} : task
      )
    )
  }


  return (
    <div className="container">
      <Header
        onAdd = {() => setShowAddTask(!showAddTask)}
        showAdd = {showAddTask}
      />
      {
        showAddTask && <AddTask onAdd = {addTask} />
      }
      {
        tasks.length > 0 ?
          <Tasks tasks = {tasks} onDelete = {deleteTask} onToggle = {toggleReminder} /> :
          'No Tasks To Show'
      }
    </div>
  );
}

export default App;
Oh, don't worry looking at this code. Let me make it easy for you. In brief, what this code exactly does is that we take a bunch of tasks in prior and then we write functions to add or remove tasks by using the useful map and filter methods in JS. We have created a state called tasks (array) consisting each and every task (object).
Tasks.js
import Task from "./Task"
const Tasks = ({ tasks, onDelete, onToggle }) => {
  return (
    <>
        {tasks.map((task) => (
            <Task key = {task.id} task = {task} onDelete = {onDelete} onToggle = {onToggle}/>
        ))}
    </>
  )
}

export default Tasks
Here comes the next component Tasks.js (remember that we've created every part of this UI as a component) used to render the tasks one by one by calling another component called Task.js
Task.js
import { FaTimes } from 'react-icons/fa';

const Task = ({ task, onDelete, onToggle }) => {
  return (
    <div className = {`task ${task.reminder && 'reminder'}`}
    onDoubleClick = {() => onToggle(task.id)}
    >
        <h3>
          {task.text}
          <FaTimes style={{ color: 'red', cursor: 'pointer' }}
          onClick = {() => onDelete(task.id)}
          />
        </h3>

        <p> {task.day} </p>
    </div>
  )
}

export default Task
Each and every task is a unique and reusable component in our project and we make it to seperate the code for reusablity and better management. I'll add a image to make you understand of all the components created and used.

Styles.css
@import url('https://fonts.googleapis.com/css2?family=Poppins:wght@300;400&display=swap');

* {
  box-sizing: border-box;
  margin: 0;
  padding: 0;
}

body {
  font-family: 'Poppins', sans-serif;
}

.container {
  max-width: 500px;
  margin: 30px auto;
  overflow: auto;
  min-height: 300px;
  border: 1px solid steelblue;
  padding: 30px;
  border-radius: 5px;
}

.header {
  display: flex;
  justify-content: space-between;
  align-items: center;
  margin-bottom: 20px;
}

.btn {
  display: inline-block;
  background-color: #000;
  color: #fff;
  border: none;
  padding: 10px 20px;
  margin: 5px;
  border-radius: 5px;
  cursor: pointer;
  text-decoration: none;
  font-size: 15px;
  font-family: inherit;
}

.btn:focus {
  outline: none;
}

.btn:active {
  transform: scale(0.98);
}

.btn-block {
  display: block;
  width: 100%;
}

.task {
  background-color: #f4f4f4;
  margin: 5px;
  padding: 10px 20px;
  cursor: pointer;
}

.reminder {
  border-left: 5px solid green;
}

.task h3 {
  display: flex;
  align-items: center;
  justify-content: space-between;
}

.add-form {
  margin-bottom: 40px;
}

.form-control {
  margin: 20px 0;
}

.form-control label {
  display: block;
}

.form-control input {
  width: 100%;
  height: 40px;
  margin: 5px;
  padding: 3px 7px;
  font-size: 17px;
}

.form-control-check {
  display: flex;
  align-items: center;
  justify-content: space-between;
}

.form-control-check label {
  flex: 1;
}

.form-control-check input {
  flex: 2;
  height: 20px;
}

footer {
  margin-top: 30px;
  text-align: center;
}
Styling is what makes UI looks more cooler and better. These are all the styling we've used in the code to add beauty to this project.
I'll wrap up here. Pretty cool, right? Oh and for the deployment part, I've discussed about that in my previous post. I'll leave the links to my repo and the live running of this project.
See you soon!